


Shopify Party is a browser-based internal tool that we built to make our virtual hangouts more fun.
The initial version was built by myself and AR/VR Designer Byron Delgado over three months. With Shopify’s move to remote, we wanted to explore how to give people a break from video fatigue and create a new space designed for social interaction.
Let’s dive into how we built it.
Game Design
While there are many tools for virtual hangouts, most focus on using video chat to recreate the office experience. In Shopify Party, players use 3D avatars to explore fantastical virtual worlds and connect with their team over games. We came up with a few guiding principles to keep it simple, approachable, and lighthearted.
Non-prescriptive Gameplay
Players in Shopify Party make up their own rules. We don’t tell them how spaces are meant to be enjoyed. Our racing level has cars in them, but you don’t have to drive them. You could ignore them altogether and instead see who can push tires the furthest.
Each level is basically a toy box with vehicles to drive, objects to throw, and places to explore. Not imposing rules has the added benefit of decreasing the amount of coding needed.
Hop-In, Hop-Off Friendly
We want to make sure that people can join and leave at any point. It would be a shame if someone were locked out of a game because they were late to the meeting. Because the spaces don’t have specific rules, game logic, or “win conditions”, this means that people are free to come and go as they please.
Easy to Learn
When you’re joining a one-on-one, standup, or brainstorm session in Party, the last thing you want to be doing is figuring out complex controls or doing a long drawn-out tutorial.
We designed Party to be as simple as possible, using the arrow keys (or WASD) to move, space to jump, and E to interact. It’s tempting to add more controls to allow for more complex interactions, but keeping it simple means that it’s approachable to a wider audience.
Tech Stack
Hopping into Shopify Party should be as frictionless as possible. There’s nothing to install, it runs in your browser, and all you have to do is click a link to join. Let’s go over the tools we used to make that happen.
Unity WebGL
WebGL is the graphics API powering most 3D experiences on the web. It’s a very low-level API, so it’s generally recommended to use a JavaScript library built on top of it such as the popular THREE.js, Babylon.js, and PlayCanvas.
In recent years, Unity has also become a solid contender for building 3D games on the web. It supports exporting to WebGL using WebAssembly, and after some initial testing, we found it to be performant enough for our use case.
We chose Unity because of everything it comes with out of the box. It’s designed for game development and comes with a fantastic editor that lets us easily manage assets and quickly build out scenes. The built-in physics support lets us bring interactivity to the world, like being able to throw and bump into objects.
We were also already quite familiar with the workflows for Unity, which ended up speeding up our development time. We’re using Unity 2020 with the Universal Rendering Pipeline (URP).
Normcore
Another big factor for choosing Unity was being able to use Normcore as our networking framework. Normcore gives us easy synchronization of all game state, top-notch VoIP, and fully networked physics.
This framework doesn’t use the typical client/server model. There’s no dedicated server (host) that runs all the game logic and has authority on game state. Instead, each player is responsible for running the logic and setting the state of things they control. Normcore acts as a realtime database that clients push updates to that are then propagated to all other connected clients.
Let's take a look at a simplified example, where players in a game are represented by 2D circles. Here we have two players, Daniel and Byron:

Both browsers have a Daniel and a Byron circle, but only Daniel's browser controls the Daniel circle. Byron’s browser relies on updates from Normcore to move his local copy of the Daniel circle to the correct position. When Daniel moves, his new position is sent to the server.

Normcore is bandwidth efficient and only sends position updates if they have changed. When it receives an update, it sends it to all connected clients.

When Byron receives the updated position for Daniel’s circle, his local copy of the game moves it to the right spot. Both games are now in sync. Normcore handles smoothly interpolating the positions so that the movement doesn’t seem choppy due to the data arriving intermittently.
Syncing State Based Off of Room Time
But what happens for objects in the world that aren’t controlled by anyone? For example, a platform moving up and down.
If we used a Unity animation to drive this platform, the position might be out of sync for clients. Depending on when someone joins, their animation playhead might be at a different point.
The fix is to drive the movement based on something that all clients have in common: the room time.
In Normcore, all clients have access to room time, which is a synchronized clock representing the current time on the server. It accounts for latency such that all clients practically have the same number. What we can do is make the movement of the platform a function of room time:
By using Sin, the value of the position will oscillate up and down as the roomtime increases. This is deterministic. If the roomtime is equal to 5 on all clients, then Sin(5) will also be equal to the same on all clients. All clients therefore see the exact same position for the platform. Doesn't matter if someone joined late or what, their room time will be the same.
By using this trick, we can quickly and easily make objects that are in sync even if they aren’t controlled by any client.
From Idea to Launch in Three Months
Party had a quick timeline. With other projects and priorities on the go, we wanted to get it in people’s hands as quickly as possible. Here’s how we sped development up.
3rd Party Assets
The Unity Asset store has a ton of free and paid assets for games. This was a huge help for building out our levels. Most of our props and environments come from the Asset Store.

The main assets that we made from scratch were our characters.
Character Design
We wanted to let people customize their character to represent their physical or fantastical selves.
The challenge was enabling thousands of customizations without adding too much complexity. Creating 3D models for different tops, bottoms, and shoes would take up way too much time. Instead, our outfits are textures applied to the base character model. These are images that get applied to the 3D model.

The textures for each part of the outfit are separate. We have a folder of shoe textures, shirt textures, pants, and so on. At runtime, all the outfit choices for a character get combined into a single texture that gets superimposed on top of the character’s skin color.
 This combining of textures is done inside a single shader. A shader is a program run on the GPU that determines the final color of pixels that are rendered. The more shaders you have, the longer it can take to render a single frame. Having the whole outfit of the character in a single shader leads to better performance for us.
Let’s take a look at a part of our character Shader that combines the shirt and pants on top of the skin color:

- This Tiling and Offset node positions the shirt in the top left corner.
- This SampleTexture2D node brings in the shirt texture.
- This Blend node overlays the shirt texture onto the skin texture by using the overwrite blend mode.
- This Tiling and Offset node positions the pants in the top right corner.
- This SampleTexture2D node brings in the pant texture.
- This Blend node overlays the pant texture on top of the previously blended shirt and skin.
This process is repeated for the gloves, shoes, beard stubble, hair fade and cheek makeup. The biggest benefit with this approach is being able to create new outfits with ease. Anywhere in the texture that’s transparent will end up being skin color, so it’s possible to create long sleeve shirts, shorts, tshirts, and more.


Hats and Hair
We couldn’t get away with only using textures for hair or hats. These needed 3D models. We ended up modeling 40 different hairstyles that people could pick from.

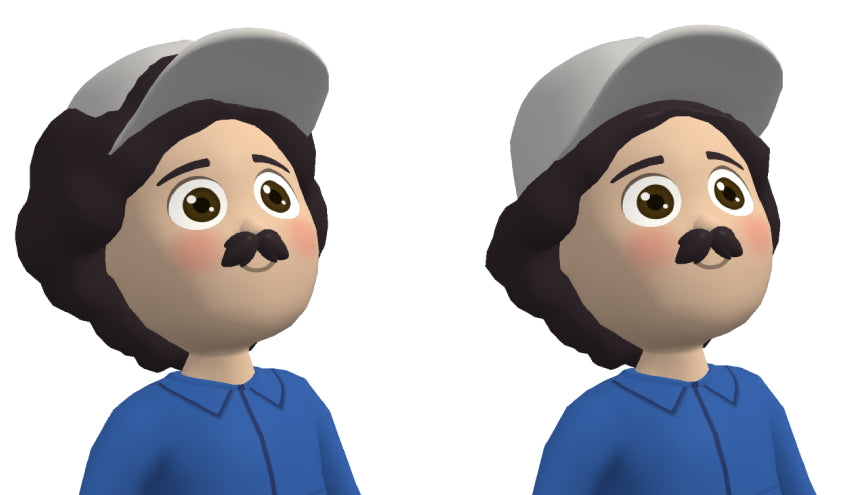
Right: Modified hair model that fits under all hats
Mouths and Eyes
The eyes and the mouth are not part of the character shader, but instead are meshes that sit on top of the face. The reason for this is because we want to be able to easily animate both of them. We add in a blinking animation, as well as animate the mouths whenever the character talks. It really helps make the characters come to life.
Optimization
One of the benefits of Party being an internal tool is that we know exactly what hardware it will be running on. However, our hardware spans from powerful M1 Pros all the way to Pixelbooks, which means careful consideration has to be made for performance. Here are a few ways we make sure the game runs at a smooth 60FPS.
Simple Materials
The latest and greatest in 3D rendering these days is Physically Based Rendering, commonly referred to as PBR. This is a complex shader that renders materials in a way that models the flow of light in the real world, leading to very realistic results. This can often be overkill for low-poly stylized games, which Party definitely is.
For any assets we buy or build, we make sure that the materials are set to Simple Lit, which uses a lighting model that’s much cheaper than PBR. We also aim to use only one texture per material and try to limit it to 1024x1024 resolution. By avoiding multiple textures like normal, metallic, and occlusion maps, we save memory and GPU computation.

GPU Instancing
When Party was first being developed, Unity’s new optimizer called Scriptable Render Pipeline Batcher (SRP Batcher for short), wasn’t available for WebGL. Because of this, we had to use a different technique for optimizing draw calls.
A draw call is when the CPU tells the GPU to draw a given 3D model and material. The more times that a CPU has to do a roundtrip with the GPU, the longer it takes to render your scene. Reducing the amount of draw calls can significantly boost performance.
GPU instancing is a technique that can be used when you have a lot of identical models in your scene. Instead of the CPU passing the data one by one to the GPU, it instead passes the single 3D model you want to draw along with a list of all positions you want it drawn in.
Here’s a simulation of a simple scene being rendered with and without instancing:


Adjustable Render Resolution
Unity’s Universal Render Pipeline settings allow you to specify a render scale that determines the size of the image being rendered to screen. A render scale of 1 in a 1920x1080 window renders the game at 1920x1080. A render scale of 0.5 renders the game at 960x540 but then stretches the image up to the window’s size (1920x1080).
Lowering the render scale leads to less pixels needing to be rendered, which leads to better performance. It’s an easy hack to adjust the render scale to be lower on Pixelbooks than on Mac. Where this falls apart is when a Pixelbook is connected to a 4K monitor and a render scale of 0.5 still means the game is rendered at 1920x1080. To get around this, we adjust the render scale based on the desired resolution and current window size:
For Pixelbooks, we set the targetWidth to be 1536. This code means that the max render width will always be 1536, regardless of window resolution.
What’s Next?
The launch of Shopify Party was a success that exceeded our expectations. Hundreds of games are played each week for one-on-ones, icebreakers, standups, and other team events. We’ve received feedback from people saying they feel more comfortable and less anxious participating in this playful setting than in a large video call.
Our goal is not to replace existing video conferencing tools, but to give different options for how to engage with peers. We not only aim to create a fun and social virtual space, but also to be a project that people can contribute to and help grow.
Someone can do a Blender tutorial over a weekend and see their art in the game a few days later. Someone else can do a Unity game dev course and create an experience that thousands of employees can enjoy. It’s a sandbox for creativity that invites people to pick up new skills and experiment with.
Daniel Beauchamp is an AR/VR Principal Engineer at Shopify, building social virtual environments to help bring developers together for fun and collaboration. You can find Daniel on Twitter, GitHub, and building random experiments for fun.
Want to try out Shopify Party? Visit our Engineering career page to find out about our open positions. Join our remote team and work (almost) anywhere. Learn about how we’re hiring to design the future together—a future that is digital by default. Party on!