


By Carlos Pereira, James Lockhart, and Cecilia Hunka
When the iOS 14 beta was originally announced, we knew we needed to take advantage of the new widget features and get something to our merchants. The new widgets looked awesome and could really give merchants a way to see their shop’s data at a glance without needing to open our app.
Fast forward a couple of years, and we now have lots of feedback from the new design. We knew merchants were using them, but they needed more. The current design was lacking and only provided two metrics—also, they took up a lot of space. This experience prompted us to start a new project. To upgrade our original design to better fit our merchant’s needs.
Table of Contents
Why Widgets Are Important to Shopify
Our widgets mainly focus on analytics. Analytics can help merchants understand how they’re doing and gain insights to make better decisions quickly about their business. Monitoring metrics is a daily activity for a lot of our merchants, and on mobile, we have the opportunity to give merchants a faster way to access this data through widgets. As widgets provide access to “at a glance” information about your shop and allow merchants a unique avenue to quickly get a pulse on their shops that they wouldn’t find on desktop.

After gathering feedback and continuously looking for opportunities to enhance our widget capabilities, we’re at our third iteration, and we’ll share with you how we approached building widgets and some of the challenges we faced.
Why We Didn’t Use React Native
A couple years ago Shopify decided to go all in on React Native. New development was done in React Native and we began migrating some apps to the new stack. Including our flagship admin app, where we were building our widgets. Which posed the question, should we write the widgets in React Native?
After doing some investigation we quickly hit some roadblocks: app extensions are limited in terms of memory, WidgetKit’s architecture is highly optimized to work with SwiftUI as the view hierarchy is serialized to disk, there’s also, at this time, no official support in the React Native community for widgets.
Shopify believes in using the right tool for the job, we believe that native development with SwiftUI was the best choice in this case.
Building the Widgets
When building out our architecture for widgets, we wanted to create a consistent experience on both iOS and Android while preserving platform idioms where it made sense. Below we’ll go over our experience and strategies building the widgets, pointing out some of the more difficult challenges we faced. Our aim is to shed some light around these less talked about surfaces, give some inspiration for your projects, and hopefully, save time when it comes to implementing your widgets.
Fetching Data
Some types of widgets have data that change less frequently (for example, reminders) and some that can be forecasted for the entire day (for example, Calendar and weather). In our case, the merchants need up-to-date metrics about their business, so we need to show data as fresh as possible. Time for our widget is crucial. Delays in data can cause confusion, or even worse, delay information that could inform a business decision. For example, let’s say you watch the stocks app. You would expect the stock app and its corresponding widget data to be as up to date as possible. If the data is multiple hours stale, you could miss valuable information for making decisions or you could miss an important drop or rise in price. With our product, our merchants need as up to date information as we can provide them to run their business.
Fetching Data in the App
Widgets can be kept up to date with relevant and timely information by using data available locally or fetching it from a server. The server fetching can be initiated by the widget itself or by the host app. In our case, since the app doesn’t share the same information as the widget, we decided it made more sense to fetch it from the widget.
We still consider moving data fetching to the app once we start sharing similar data between widgets and the app. This architecture could simplify the handling of authentication, state management, updating data, and caching in our widget since only one process will have this job rather than two separate processes. It’s worth noting that the widget can access code from the main app, but they can only communicate data through keychain and shared user defaults as widgets run on separate processes. Sharing the data fetching, however, comes with an added complexity of having a background process pushing or making data available to the widgets, since widgets must remain functional even if the app isn’t in the foreground or background. For now, we’re happy with the current solution: the widgets fetch data independently from the app while sharing the session management code and tokens.

Querying Business Analytics Data with Reportify and ShopifyQL
The business data and visualizations displayed in the widgets are powered by Reportify, an in-house service that exposes data through a set of schemas queried via ShopifyQL, Shopify’s Commerce data querying language. It looks very similar to SQL but is designed around data for commerce. For example, to fetch a shops total sales for the day:
Making Our Widgets Antifragile
iOS Widgets' architecture is built in a way that updates are mindful of battery usage and are budgeted by the system. In the same way, our widgets must also be mindful of saving bandwidth when fetching data over a network. While developing our second iteration we came across a peculiar problem that was exacerbated by our specific use case.
Since we need data to be fresh, we always pull new data from our backend on every update. Each update is approximately 15 minutes apart to avoid having our widgets stop updating (which you can read about why on Apple’s Developer site). We found that iOS calls the update methods, getTimeline() and getSnapshot(), more than once in an update cycle. In widgets like calendar, these extra calls come without much extra cost as the data is stored locally. However, in our app, this was triggering two to five extra network calls for the same widget with the same data in quick succession.
We also noticed these calls were causing a seemingly unrelated kick out issue affecting the app. Each widget runs on a different process than the main application, and all widgets share the keychain. Once the app requests data from the API, it checks to see if it has an authenticated token in the keychain. If that token is stale, our system pauses updates, refreshes the token, and continues network requests. In the case of our widgets, each widget call to update was creating another workflow that could need a token refresh. When we only had a single widget or update flow, it worked great! Even four to five updates would usually work pretty well. However, eventually one of these network calls would come out of order and an invalid token would get saved. On our next update, we have no way to retrieve data or request a new token resulting in a session kick out. This was a great find as it was causing a lot of frustration for our affected merchants and ourselves, who could never really put our finger on why these things would, every now and again, just log us out.
In order to correct the unnecessary roundtrips, we built a simple short-lived cache:
- The system asks our widget to provide new data
- We first look into the local cache using a key specific to that widget. On iOS, our key is produced from a configuration for that widget as there’s no unique identifiers provided. We also take into account configuration such as locale so as not to avoid forcing updates after a language change.
- If there’s data, and that data was set less than one minute ago, we return it and avoid making a network request.
- Otherwise, we fetch the data as normal and store it in the cache with the timestamp.

With this solution, we reduced unused network calls and system load, avoided collecting incorrect analytics, and fixed a long running bug with our app kick outs!
Implementing Decoder Strategy with Dynamic Selections
When fetching the data from the Analytics REST service, each widget can be configured with two to seven metrics from a total of 12. This set should grow in the future as new metrics are available too! Our current set of metrics are all time-based and have a similar structure.
But that doesn’t mean the structure of future metrics will not change. For example, what about a metric that contains data that isn’t mapped over a time range? (like orders to fulfill, which does not contain any historical information).
The merchant is also able to configure the order the metrics appear, which shop (if they have more than one shop), and which date range represents the data: today, last 7 days, and last 30 days.
We had to implement a data fetching and decoding mechanism that:
- only fetches the data the merchant requested in order to avoid asking for unneeded information
- supports a set of metrics as well as being flexible to add future metrics with different shapes
- supports different date ranges for the data.
A simplified version of the solution is shown below. First, we create a struct to represent the query to the analytics service (Reportify).
Then, we create a class to represent the decodable response. Right now it has a fixed structure (value, comparison, and chart values), but in the future we can use an enum or different subclasses to decode different shapes.
Next, we create a response wrapper that attempts to decode the metrics based on a list of metric types passed to it. Each metric has its configuration, so we know which class is used to read the values.
Finally, when the widget Timeline Provider asks for new data, we fetch the data from the current metrics and decode the response.
Building the UI
We wanted to support the three widget sizes: small, medium, and large. From the start we wanted to have a single View to support all sizes as an attempt to minimize UI discrepancies and make the code easy to maintain.
We started by identifying the common structure and creating components. We ended up with a Metric Cell component that has three variations:


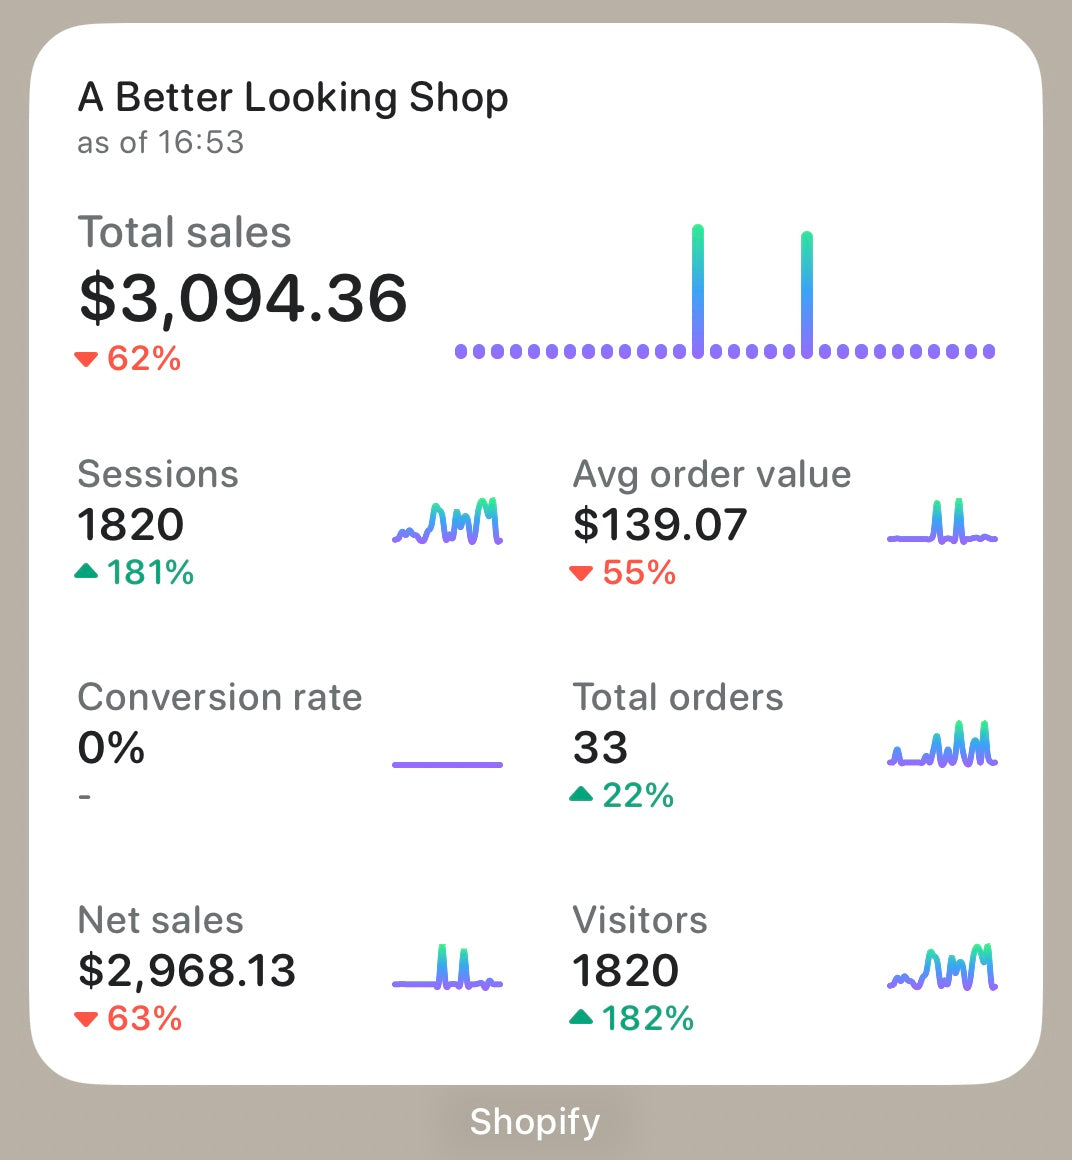
All three variations consist of a metric name and value, chart, and a comparison. As the widget containers become bigger, we show the merchant more data. Each view size contains more metrics, and the largest widget contains a full width chart on the first chosen metric. The comparison indicator also gets shifted from bottom to right on this variation.
The first chosen metric, on the large widget, is shown as a full width cell with a bar chart showing the data more clearly; we call it the Primary cell. We added a structure to indicate if a cell is going to be used as primary or not. Besides the primary flag, our component doesn’t have any context about the widget size, so we use chart data as an indicator to render a cell primary or not. This paradigm fits very well with SwiftUI.
A simplified version of the actual Cell View:
After building our cells, we need to create a structure to render them in a grid according to the size and metrics chosen by the merchant. This component also has no context of the widget size, so our layout decisions are mainly based on how many metrics we are receiving. In this example, we’ll refer to the View as a WidgetView.
The WidgetView is initialized with a WidgetState, a struct that holds most of the widget data such as shop information, the chosen metrics and their data, and a last updated string (which represents the last time the widget was updated).
To be able to make decisions on layout based on the widget characteristics, we created an OptionSet called LayoutOption. This is passed as an array to the WidgetView.
Layout options:
That helped us not to tie this component to Widget families, rather to layout characteristics that makes this component very reusable in other contexts.
The WidgetView layout is built using mainly a LazyVGrid component:
A simplified version of the actual View:
Adding Dynamic Dates
One important piece of information on our widget is the last updated timestamp. It helps remove confusion by allowing merchants too quickly know how fresh the data is they’re looking at. Since iOS has an approximate update time with many variables, coupled with data connectivity, it’s very possible the data could be over 15 minutes old. If the data is quite stale (say you went to the cottage for the weekend and missed a few updates) and there was no update string, you would assume the data you’re looking at is up to the second. This can cause unnecessary confusion for our merchants. The solution here was to ensure there’s some communication to our merchant when the last update was.
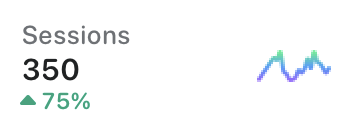
In our previous design, we only had small widgets, and they were able to display only one metric. This information resulted in a long string, that on smaller devices, would sometimes wrap and show over two lines. This was fine when space was abundant in our older design but not in our new data rich designs. We explored how we could best work with timestamps on widgets, and the most promising solution was to use relative time. Instead of having a static value such as “as of 3:30pm” like our previous iteration, we would have a dynamic date that would look like: “1 min, 3 sec ago.”
One thing to remember is that even though the widget is visible, we have a limited number of updates we can trigger. Otherwise, it would be consuming a lot of unnecessary resources on the merchant’s device. We knew we couldn’t keep triggering updates on the widget as often as we wanted (nor would it be allowed), but iOS has ways to deal with this. Apple did release support for dynamic text on widgets during our development that allowed using timers on your widgets without requiring updates. We simply need to pass a style to a Text component and it automatically keeps everything up to date:
Text("\(now, style: .relative) ago")
It was good, but we have no options to customize the relative style. Being able to customize the relative style was an important point for us, as the current supported style does not fit well with our widget layout. One of our biggest constraints with widgets is space as we always need to think about the smallest widget possible. In the end we decided not to move forward with the relative time approach, and kept a reduced version of our previous timestamp.
Adding Configuration
Our new widgets have a great amount of configuration, allowing for merchants to choose exactly what they care about. For each widget size, the merchant can select the store, a certain number of metrics, and a date range. On iOS, widgets are configured through the SiriKit Intents API. We faced some challenges with the WidgetConfiguration, but fortunately, all had workarounds that fit our use cases.

It’s Not Possible to Deselect a Metric
When defining a field that has multiple values provided dynamically, we can limit the number of options per widget family. This was important for us, since each widget size has a different number of metrics it can support. However, the current UI on iOS for widget configuration only allows selecting a value but not deselecting it. So, once we selected a metric we couldn’t remove it, only update the selection. But what if the merchant were only interested in one metric on the small widget? We solved this with a small design change, by providing “None” as an option. If the merchant were to choose this option, it would be ignored and shown as an empty state.
It's not possible to validate the user selections
With the addition of “None” and the way intents are designed, it was possible to select all “None” and have a widget with no metrics. In addition, it was possible to select the same metric twice.. We would like to be able to validate the user selection, but the Intents API didn't support it. The solution was to embrace the fact that a widget can be empty and show as an empty state. Duplicates were filtered out so any more than a single metric choice was changed to “None” before we sent any network requests.
The First Calls to getTimeline and getSnapshot Don’t Respect the Maximum Metric Count
For intent configurations provided dynamically, we must provide default values in the IntentHandler. In our case, the metrics list varies per widget family. In the IntentHandler, it’s not possible to query which widget family is being used. So we had to return at least as many metrics as the largest widget (seven).
However, even if we limit the number of metrics per family, the first getTimeline and getSnapshot calls in the Timeline Provider were filling the configuration object with all default metrics, so a small widget would have seven metrics instead of two!
We ended up adding some cleanup code in the beginning of the Timeline Provider methods that trims the list depending on the expected number of metrics.
Optimizing Testing
Automated tests are a fundamental part of Shopify’s development process. In the Shopify app, we have a good amount of unit and snapshot tests. The old widgets on Android had good test coverage already, and we built on the existing infrastructure. On iOS, however, there were no tests since it’s currently not possible to add test targets against a widget extension on Xcode.
Given this would be a complex project and we didn’t want to compromise on quality, we investigated possible solutions for it.
The simplest solution would be to add each file on both the app and in the widget extension targets, then we could unit test it in the app side in our standard test target. We decided not to do this since we would always need to add a file to both targets, and it would bloat the Shopify app unnecessarily.
We chose to create a separate module (a framework in our case) and move all testable code there. Then we could create unit and snapshot tests for this module.
We ended up moving most of the code, like views and business logic, to this new module (WidgetCore), while the extension only had WidgetKit specific code and configuration like Timeline provider, widget bundle, and intent definition generated files.
Given our code in the Shopify app is based on UIKit, we did have to update our in-house snapshot testing framework to support SwiftUI views. We were very happy with the results. We ended up achieving a high test coverage, and the tests flagged many regressions during development.
Fast SwiftUI Previews
The Shopify app is a big application, and it takes a while to build. Given the widget extension is based on our main app target, it took a long time to prepare the SwiftUI previews. This caused frustration during development. It also removed one of the biggest benefits of SwiftUI—our ability to iterate quickly with Previews and the fast feedback cycle during UI development.
One idea we had was to create a module that didn’t rely on our main app target. We created one called WidgetCore where we put a lot of our reusable Views and business logic. It was fast to build and could also render SwiftUI previews. The one caveat is, since it wasn’t a widget extension target, we couldn’t leverage the WidgetPreviewContext API to render views on a device. It meant we needed to load up the extension to ensure the designs and changes were always working as expected on all sizes and modes (light and dark).
To solve this problem, we created a PreviewLayout extension. This had all the widget sizes based on the Apple documentation, and we were able to use it in a similar way:
Our PreviewLayout extension would be used on all of our widget related views in our WidgetCore module to emulate the sizes in previews:
Acquiring Analytics
Since our first widgets were developed, we wanted to understand how merchants are using the functionality, so we can always improve it. The data team built some dashboards showing things like a detailed view of how many widgets installed, the most popular metrics, and sizes.
Most of the data used to build the dashboards come from analytics events fired through the widgets and the Shopify app.
For the new widgets, we wanted to better understand adoption and retention of widgets, so we needed to capture how users are configuring their widgets over time and which ones are being added or removed.
Managing Unique Ids
WidgetKit has the WidgetCenter struct that allows requesting information about the widgets currently configured in the device through the getCurrentConfigurations method. However, the list of metadata returned (WidgetInfo) doesn’t have a stable unique identifier. Its identifier is the object itself, since it’s hashable. Given this constraint, if two identical widgets are added, they’ll both have the same identifier. Also, given the intent configuration is part of the id, if something changes (for example, date range) it’ll look like it’s a totally different widget.
Given this limitation, we had to adjust the way we calculate the number of unique widgets. It also made it harder to distinguish between different life-cycle events (adding, removing, and configuring). Hopefully there will be a way to get unique ids for widgets in future versions of iOS. For now we created a single value derived from the most important parts of the widget configuration.
Detecting, Adding, and Removing Widgets
Currently there’s no WidgetKit life cycle method that tells us when a widget was added, configured, or removed. We needed it so we can better understand how widgets are being used.
After some exploration, we noticed that the only methods we could count on were getTimeline and getSnapshot. We then decided to build something that could simulate these missing life cycle methods by using the ones we had available. getSnapshot is usually called on state transitions and also on the widget Gallery, so we discarded it as an option.
We built a solution that did the following
- Every time the Timeline providers’
getTimelineis called, we call WidgetKit’s getCurrentConfigurations to see what are the current widgets installed. - We then compare this list with a previous snapshot we persist on disk.
- Based on this comparison we try to guess which widgets were added and removed.
- Then we triggered the proper life cycle methods:
didAddWidgets(),didRemoveWidgets().
Due to identifiers not being stable, we couldn’t find a reliable approach to detect configuration changes, so we ended up not supporting it.
We also noticed that WidgetKit.getCurrentConfigurations’s results can have some delay. If we remove a widget, it may take a couple getTimeline calls for it to be reflected. We adjusted our analytics scheme to take that into account.

Supporting iOS 16
Our approach to widgets made supporting iOS 16 out of the gate really simple with a few changes. Since our lock screen complications will surface the same information as our home screen widgets, we can actually reuse the Intent configuration, Timeline Provider, and most of the views! The only change we need to make is to adjust the supported families to include .accessoryInline, .accessoryCircular, and .accessoryRectangular, and, of course, draw those views.
Our Main View would also just need a slight adjustment to work with our existing home screen widgets.
Migrating Gracefully
WidgetKit was introduced for watchOS complications in iOS 16. This update comes with a foreboding message from Apple:
Important

As soon as you offer a widget-based complication, the system stops calling ClockKit APIs. For example, it no longer calls your CLKComplicationDataSource object’s methods to request timeline entries. The system may still wake your data source for migration requests.
We really care about our apps at Shopify, so we really needed to unpack what this meant, and how does this affect our merchants running older devices? With some testing on devices, we were able to find out, everything is fine.
If you’re currently running WidgetKit complications and add support for lock screen complications, your ClockKit app and complications will continue to function as you’d expect.
What we had assumed was that WidgetKit itself was taking the place of WatchOS complications; however, to use Widgetkit on WatchOS, you need to create a new target for the Watch. This makes sense, although the APIs are so similar we had assumed it was a one and done approach. One WidgetKit extension for both platforms.
One thing to watch out for, if you do implement the new WidgetKit on WatchOS, if your users are on WatchOS 9 and above will lose all of their complications from ClockKit. Apple did provide a migration API to support the change that’s called instead of your old complications.
If you don’t have the luxury of just setting your target to iOS 16, your complications will continue to load up for those on WatchOS 8 and below from our testing.
Shipping New Widgets
We already had a set of widgets running on both platforms, now we had to decide how to transition to the new update as they would be replacing the existing implementation. On iOS we had two different widget kinds each with their own small widget (you can think of kinds as a widget group). With the new implementation, we wanted to provide a single widget kind that offered all three sizes. We didn’t find much documentation around the migration, so we simulated what happens to the widgets under different scenarios.
If the merchant has a widget on their home screen and the app updates, one of two things would happen:
- The widget would become a white blank square (the kind IDs matched).
- The widget just disappeared altogether (the kind ID was changed).
The initial plan (we had hoped for) was to make one of our widgets transform into the new widget while removing the other one. Given the above, this strategy wouldn’t work. This also includes some annoying tech debt since all of our Intent files would continue to mention the name of the old widget.
The compromise we came to, so as to not completely remove all of a merchant’s widgets overnight, was to deprecate the old widgets at the same time we release the new ones. To deprecate, we updated our old widget’s UI to display a message informing that the widget is no longer supported, and the merchant must add the new ones. The lesson here is you have to be careful when you make decisions around widget grouping as it’s not easy to change.
There’s no way to add a new widget programmatically or to bring the merchant to the widget gallery by tapping on the old widget. We also added some communication to help ease the transition by:
- updating our help center docs, including information around how to use widgets
- pointing our old widgets to open the help center docs
- giving lots of time before removing the deprecation message.
In the end, it wasn’t the most ideal situation, and we came away learning about the pitfalls within the two ecosystems. One piece of advice is to really reflect on current and future needs when defining which widgets to offer and how to split them, since a future modification may not be straightforward.

What’s Next
As we continue to learn about how merchants use our new generation of widgets, we’ll continue to hone in on the best experience across both our platforms. Our widgets were made to be flexible, and we’ll be able to continually grow the list of metrics we offer through our customization. This work opens the way for other teams at Shopify to build on what we’ve started and create more widgets to help Merchants too.
2022 is a busy year with iOS 16 coming out. We’ve got a new WidgetKit experience to integrate to our watch complications, lock screen complications, and live activities hopefully later this year!
Carlos Pereira is a Senior Developer based in Montreal, Canada, with more than a decade of experience building native iOS applications in Objective-C, Swift and now React Native. Currently contributing to the Shopify admin app.
James Lockhart is a Staff Developer based in Ottawa, Canada. Experiencing mobile development over the past 10+ years: from Phonegap to native iOS/Android and now React native. He is an avid baker and cook when not contributing to the Shopify admin app.
Cecilia Hunka is a developer on the Core Admin Experience team at Shopify. Based in Toronto, Canada, she loves live music and jigsaw puzzles.
Wherever you are, your next journey starts here! If building systems from the ground up to solve real-world problems interests you, our Engineering blog has stories about other challenges we have encountered. Intrigued? Visit our Engineering career page to find out about our open positions and learn about Digital by Design.