


Welcome back to part two of the Understanding GraphQL for Beginners series. In this tutorial, we’ll build GraphQL fields about food! If you did not read part one of this series, please read it before reading this part.
As a refresher, GraphQL is a data manipulation and query language for APIs. The two main benefits of implementing GraphQL are
- The ability to describe the structure you want back as your response.
- Only needing one endpoint to consume one or more resources.
Learning Outcomes
-
Examine the file directory of GraphQL.
-
Identify the difference between root fields and object fields.
-
Create a GraphQL object based on an existing Ruby on Rails model.
-
Create a GraphQL root field to define the structure of your response.
-
Use a GraphQL root field to query data within a database.
-
Examine how the GraphQL endpoint works.
Before You Start
Download the repository to follow along in this tutorial. The repository has been set up with models and gems needed for GraphQL. Once downloaded, seed the database.
The following models are
Food
| Attribute | Type |
| id | Bigint |
| Name | String |
| place_of_origin | String |
| image | String |
| created_At | Timestamp |
| updated_at | Timestamp |
Nutrition
| Attribute | Type |
| id | Bigint |
| food_id | Bigint |
| serving_size | String |
| calories | String |
| total_fat | String |
| trans_fat | String |
| saturated_fat | String |
| cholesterol | String |
| sodium | String |
| Potassium | String |
| total_carbohydrate | String |
| dietary_fiber | String |
| sugars | String |
| protein | String |
| vitamin_a | String |
| vitamin_c | String |
| calciuum | String |
| iron | String |
| created_at | Timestamp |
| update_at | Timestamp |
GraphQL File Structure
Everything GraphQL related is found in the folder called “graphql” under “/app”. Open up your IDE editor, and look at the file structure under “graphql”.

In the yellow highlighted box, there are two directories here:
-
“Mutations”
This folder contains classes that will modify (create, update or delete) data. -
“Types”
This folder contains classes that define what will be returned. As well as the type of queries (mutation_type.rb and query_type.rb) that can be called.
In the red highlighted box, there’s one important file to note.

The class food_app_schema.rb, defines the queries you can make.
Creating Your First GraphQL Query all_food
We’re creating a query that returns us a list of all the food. To do that, we need to create fields. There are two kinds of fields:
- Root fields define the structure of your response fields based on the object fields selected. They’re the entry points (similar to endpoints) to your GraphQL server.
- Object fields are attributes of an object.
We create a new GraphQL object called food. On your terminal run rails g graphql:object food. This will create the file food_type.rb filled with all the attributes found in your foods table in db/schema.rb. Your generated food_type.rb will look like:
This class contains all the object fields, exposing a specific data of an object. Next, we need to create the root field that allows us to ask the GraphQL server for what we want. Go to the file query_type.rb that’s a class that contains all root fields.
Remove the field test_field and its method. Create a field called all_food like below. As food is both a singular and plural term, we use all_food to be plural.
The format for field is as followed:
- The field name (
:all_food). - The return type for the field (
[Types::FoodType]). - Whether the field will ever be null (
null: false). By setting this to false, it means that the field will never be null. - The description of the field (
description: "Get all the food items.").
Congratulations, you’ve created your first GraphQL query! Let’s go test it out!
How to Write and Run Your GraphQL Query
To test your newly created query, we use the playground, GraphiQL, to execute the all_food query. To access GraphiQL, add the following URI to your web address: localhost:3000/graphiql.
You will see this page:
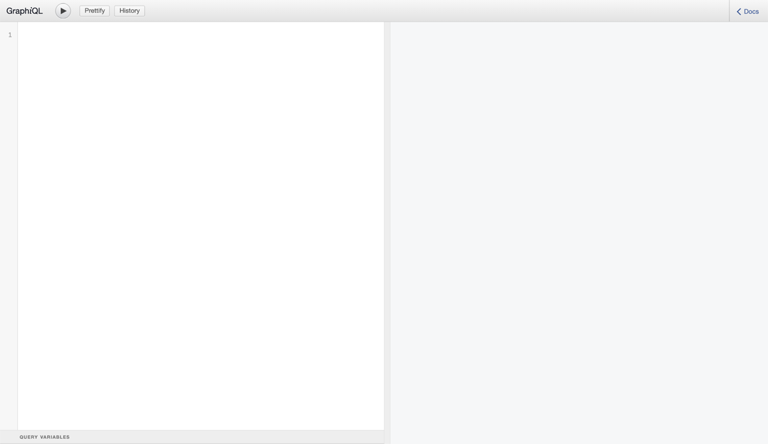
The left side of the page is where we will write our query. The right side will return the response to that query.
Near the top left corner next to the GraphiQL text contains three buttons:

- This button will execute your query.
- This button will reformat your query to look pretty.
- This button will show all previous queries you ran.
- On the right corner of the menu bar is a button called “< Docs”.

If you click on the “< Docs” button in the top right corner, you can find all the possible queries based on your schema.

The queries are split into two groups, query and mutation. “query” which contains all queries that do not modify data. Queries that do modify data can be found in “mutation”. Click on “query: Query” to find the “all_food” query we just created.
![A screenshot of the Query screen with a result displaying the field allFood: [Food!]!](https://cdn.shopify.com/s/files/1/0779/4361/files/GraphiQLDocsQuery.png?v=1625240813)
After clicking on “query: Query”, you will find all the possible queries you can make. If you click on [Food!]!, you will see all the possible fields we can ask for.

These are all the possible fields you can use within your all_food query.Remember, GraphQL allows us to describe exactly what we need. Let’s say we only want the ids and names of all food items. We write the query as
Click the execute button to run the query. You get the following response back:
Awesome job! Now, create another query to get the image and place_of_origin fields back:
You will get this response back.
What’s Happening Behind the Scenes?
Recall from part one, GraphQL has this single “smart” endpoint that bundles all different types of RESTful actions under one endpoint. This is what happens when you make a request and get a response back.

When you execute the query:
- You call the graphql endpoint with your request (for example, query and variables).
- The graphql endpoint then calls the execute method from the graphql_controller to process your request.
- The method renders a JSON containing a response catered to your request.
- You get a response back.
Try it Yourself #1
Try to implement the root field called nutrition. Like all_food, it returns all nutrition facts.
If you need any assistance, please refer to this gist that includes a sample query and response: https://gist.github.com/ShopifyEng/7c196bf443bdf26e55f827d65ee490a6
Adding a Field to an Existing Query.
You may have noticed that the nutrition table contains a foreign key, where a food item has one nutrition fact. Currently, it’s associated at the model level but not used at the GraphQL level. For someone to query food and get the nutrition fact as well, we need to add a nutrition field to food.
Add the following field to food_type.rb:
field :nutrition, Types::NutritionType, null: true
Let’s execute the following query where we want to know the serving size and calories of each food item:
You will get this response back:
Hooray! We now know the serving size and calories of each food item!
So far, we learned how to create root fields to query all data of a specific resource. Let’s write a query to look at data based on id.
Writing a Query with an Argument
In query_type.rb, we need to add another root field called food that requires and takes an argument called id:
On GraphiQL, let’s execute this query:
You will get this response back:
Try it Yourself #2
This time, create a root field called find_food, which returns a set of data based on place_of_origin.
If you need any assistance, please refer to this gist that includes a sample query and response: https://gist.github.com/ShopifyEng/1f92cee91f2932a0ef665594418764d3
As we’ve reached the end of this tutorial, let’s recap what we learned!
- GraphQL generates and populates an object if the model with the same name exists.
- Root fields define the structure of your response and are entry points to your GraphQL server.
- Object fields are an object’s attributes.
- All requests are processed by the graphql_controller’s execute method and return a JSON response back.
I hope you enjoyed creating some GraphQL queries! One thing you might still be wondering is how do we update these ActiveRecord objects? In part 3 of Understanding GraphQL for Beginners, we’ll continue creating queries called mutations that create, update, or delete data.
If you would like to see the finished code for part two, check out the branch called part-2-solution.
Often mistaken as an intern, Raymond Chung is building a new generation of software developers through Shopify's Dev Degree program. As a Technical Educator, his passion for computer science and education allows him to create bite-sized content that engages interns throughout their day-to-day. When he is not teaching, you'll find Raymond exploring for the best bubble tea shop.
We're planning to DOUBLE our engineering team in 2021 by hiring 2,021 new technical roles (see what we did there?). Our platform handled record-breaking sales over BFCM and commerce isn't slowing down. Help us scale & make commerce better for everyone.